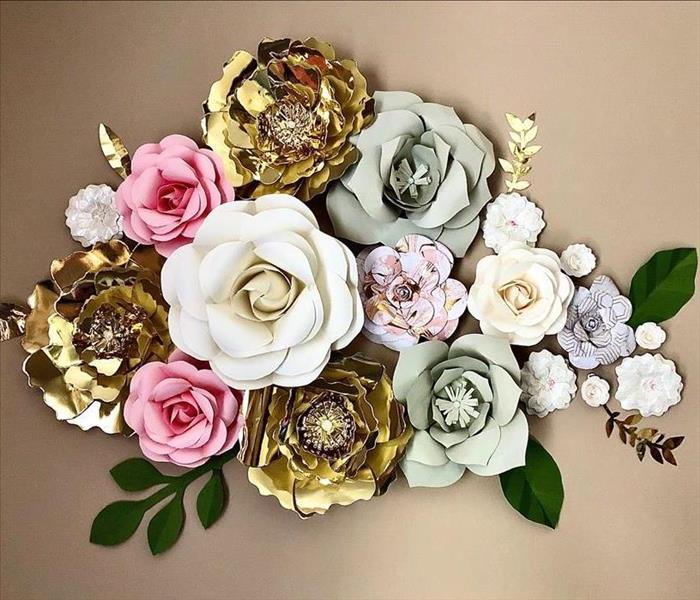
DIY Paper Flowers by Bella
4/16/2020 (Permalink)
Ever see those beautiful paper flowers used for wall décor? You can usually find them in little girls’ rooms or for birthday parties.
I decided to make some for our daughter’s room. I mean we are stuck in the house right now, so why not? Might as well get creative!
Well I did it and I’m going to share an easy step by step on how to make your own!
You will need:
- Card stock paper in whatever colors and patterns you are wanting.
- Hot glue gun & glue sticks
- Gems (for middle of some flowers)
- Scissors
- Scotch tape
- Thumb tacks
- Pencil
- Thin floral wire
The first thing you will need to do is Google or Pinterest some templates for the flower type you are wanting. This gives you the petal shapes you need! You also need to make sure you find various sizes, if that’s the look you are wanting. Once you’ve got your templates, go ahead and print them!
Next, using your templates, trace the petal shapes onto your cardstock paper and cut the petals out. You will also need a circle (if not included in your template) to glue the petals onto and leaves to accent the flowers.
Once the petals are cut out use your pencil and wrap the end of the petals around it. This will curve the petals to make them look more realistic.
Then you are going to use your hot glue gun to layer the petals. You should lay down your largest size petals first and decrease the petal size as you work toward the middle of the flower.
For the center of your flower you can either use a gem, or fold a thin rectangular piece of paper (2” x 5”) in half and fringe it (leaving about a ½” to not cut all the way through) so when you roll in up it creates a different look for the center. There are so many ways to make the flower center though, so don’t be afraid to look around at different ideas!
Next you will take a small section of floral wire (about 1/2”-1”) and make a small loop. Hot glue the loop onto the back of the flower circle. Do this for all your flowers, as this will be how you hang them on the wall.
Now let’s talk about putting the flowers up! Make sure you’ve given the flowers plenty of time to sit so the glue is dried and hardened. Once the flowers are ready, set them onto the floor or table and arrange them how you’d like to see them on the wall. This is such an important part so that you have the exact look you want and know if you need to add more flowers or leaves!
Lastly you get to put your beautiful flowers up on the wall! (YAY!!!) This is the moment you’ve waited for. The moment you get to see these paper beauties shine! Start with your middle-most flower and use a thumb tack through the wire to pin it into place. Then take the flowers directly around that flower and pin them up. Continue placing the flowers onto the wall from the middle out. Once you only have leaves left, use a few tiny pieces of scotch tape on the backs of them to hold them on the wall.
That’s it! You’re done!
Take a step back and admire your work. Looks great doesn’t it? Yes, yes it does! Great job, you DIYer!
Share your paper flower photos with us so we can see your beautiful designs!


 24/7 Emergency Service
